Wednesday, 10 November 2010
Free Business Cards to Download and Print


Friday, 24 September 2010
New Arrival - in the Pink!
Naturally you can expect to see a few baby related creations. I managed to find some time while waiting for bub to arrive to get some sewing and even knitting done. So once I get them photographed I can share them with you. Until next time, bye for now.
* Clip art above from http://hubpages.com/hub/baby-clipart

Friday, 14 May 2010
Chocolate Lace Butterfly Cake
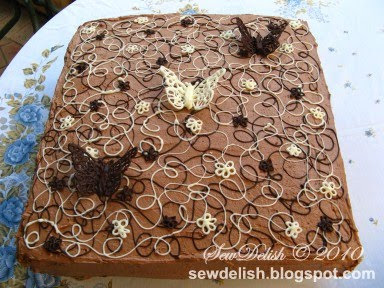
Here is the cake I made for my friend’s 40th birthday recently. You may remember the tri-shutter card I made for her that I posted previously.
The cake is 14” square, weighs over 5 kilos and took me several hours to assemble!
Inside the cake comprises of 1 layer of vanilla sponge topped with 1kg of nutella chocolate spread, 1” thickness of fresh whipped cream followed by another layer of vanilla sponge. That was then covered with lashings of my nutella and chocolate icing and decorated with chocolate lace swirls, chocolate lace flowers and chocolate lace butterflies! The butterflies were the most difficult to make with the wings and body of the butterfly made as one piece. They were very fragile and needed to be supported until the chocolate had set completely.
My friend was speechless when she arrived to pick the cake up. I thought she was going to cry! A number of guests at the party ended up taking heaps of photos of it for her as she didn’t want to cut into it! I would love to hear what you think.

Wednesday, 12 May 2010
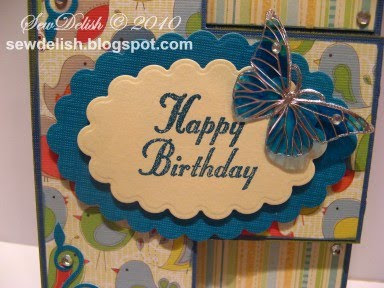
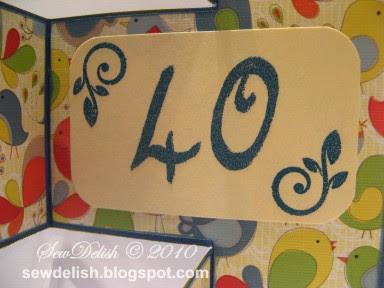
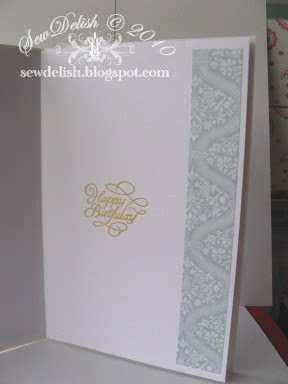
40th Birthday Tri-shutter Card
I have been wanting to make one of these tri-shutter cards for so long and finally did. My friend really likes blue and butterflies and is not very girlie so I knew it would be a challenge to make without being too flowery. It took me over a week to finally put it all together as I really was not sure about the papers being right (not my usual choice) and In the end I just left them and they have grown on me.
I gave it to my friend on her birthday recently and she loved it. She is only very new to papercrafting and was honoured to receive my first tri-shutter card.
There is a tutorial here for making one of these cards, but if you are fortunate enough to own a cricut expression cutting machine and design studio, Okielady has a cut file and step by step instructions you can use to save time measuring and cutting.
For decorating this card I used Teal Embossing powder, cuttlebug corner swirls, a peel off butterfly sticker, quickutz scalloped ovals, stamps, prima flowers and of course some bling!

Tuesday, 11 May 2010
Cup Cake Stand Doilies on My Cricut
It was my friend's birthday recently and I managed to find some time to create.
I cut huge scalloped doilies on my cricut to use on a cupcake stand. There was not enough sections on the stand for all the individual cupcakes(over 50) so I made the doilies to make room for them all.
I designed them on the Design Studio software program for the cricut and used the accent essentials cartridge. The doilies have a small hole in the centre for the stand and a slit so they can be removed and replaced without tearing the paper. I needed them to be fairly plain and not too fussy as they were for my friend’s 40th and she does not like pretty girlie things.
I also made the nutella filled chocolate cupcakes to go on the stand. They were bite sized cupcakes only 1" tall and really rich and delicious!
Tuesday, 6 April 2010
Sympathy Card Inspired by 2 Cricut Cards
When I first saw the sympathy cards posted on this cricut thread by Pinklady and Dj, I knew that was the style card I needed to make for a couple that we know. I used portions of both of the cards.
I don't have the cricut cartridges needed to make the cards above and even considered buying one or two but time was a factor. So I needed to rethink things a little. I remembered that I have a Christmas stamp by Rhonda Farrer that I could use if I masked out some of the design. Then for the background I could use the stylized flowers cuttlebug folder. The flowers are the retro flower punch by ek success.
Here is my version of the sympathy cards in the link above. I also added a subtle sparkle effect to the bird with midnight black glitter. I didn't have a sympathy stamp that I liked so I used a suitable font on my computer and printed it out on some card.

Friday, 2 April 2010
Flowersoft 3D Scenic Summer Window Birthday Card
This is a card I made recently for my Mum's birthday. She loves English gardens so I thought this flowersoft scenic 3d window card would be perfect. I have not seen these around before now so I am presuming they are new releases, not bad to find them here in Australia already.
I really love how the flowersoft looks on this card and I even made a few of my own colour combinations to get the mixes exactly the way I wanted them.
I added the sentiment to the inside of the card instead of the front in case Mum decides to frame the card later on.
There 4 style windows in each pack with 2 copies of each. They are not die cut but they don't take long to cut by hand. I sat in front of the TV and cut this one out! Then when I had a few minutes here and there I added foam dots and layered them before adding the flowersoft.

Thursday, 1 April 2010
Papermania Honey and Hugs Owl Birthday Card
The owl and happy birthday sentiment are adhered to patterned paper using foam dots to add a little dimension. I then added some stickles to the card but unfortunately it is not showing up in the photo.
I originally intended to give this card to my niece who will by turning 13 soon, but I am wondering if it may be a little too cute looking for her. I may just make another card in case I change my mind at the last minute. I would love to hear what you think.

Tuesday, 9 February 2010
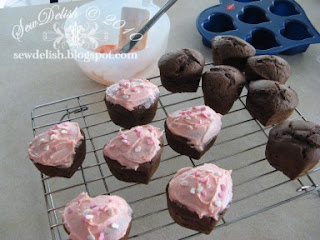
Valentine's Day Baking - Double Chocolate Heart Cupcakes
Here are some yummy double chocolate heart cupcakes dd and I made and then decorated with delicious pink icing.
We cheated and used a chocolate cake packet mix for the cakes and added a good handful of chopped chocolate pieces and choc chips before spooning the mix into the heart shaped baking mould.
The icing is made from butter, icing sugar with a tiny splash of milk and a few drops of food colouring. The cupcakes were then sprinkled with some heart shaped cake decorations.
I don't think these will be making it to Valentine's Day, LOL so thankfully they are quick and easy to make.

Friday, 5 February 2010
Back from my unexpected Blogging Break


