Thursday, 5 November 2009
Christmas Wreath Cards with Cricut and Design Studio
Once I cut the wreaths I embossed them in my cuttlebug using the textiles embossing folder and then inked them before adding a lace bow. The Merry Christmas cut in gold metallic paper from Wild Card cartridge.
The lace type card at the base is cut using the Martha Stewart zig zag border punch and the flourish corners are stamped and brushed with pearl-ex.

Twisted Pyramage Card Using One of My Own Photos
I used a photo of Bell taken a few weeks prior to her surgery where she happened to be chewing on a rock. I used pearl-ex for the thanks and stamped some paw prints on the front and inside the card.
It was Bell's chewing on a stick that got her into trouble where she needed veterinary care and major abdominal surgery. Tinker was lost without her sister until she came home. Thankfully Bell is back to her normal self now chewing on anything small enough to fit in her mouth.

Monday, 7 September 2009
Set of Onesie Baby Cards
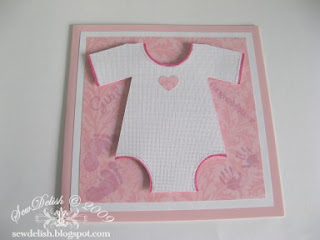
The onesie outfits I cut on my cricut and are made using a textured cardstock to give the appearance of fabric.
The stamps are from a mixture of baby ones that I own.
Handprint - Inque Boutique
Feet - Paper Studio Girls Stamps
Boy/Girl - Grant Baby Stamps
Congratulations - Stamposaurous Ellie Set of clear stamps
Like many of my cards lately I have added a punched shape to the inside top right of the cards to coordinate with the front of the card. I think this is becoming a style signature of mine and means I can use my small punches more often.

Tuesday, 1 September 2009
Monkeying Around with the New Arrival Cricut Cartridge
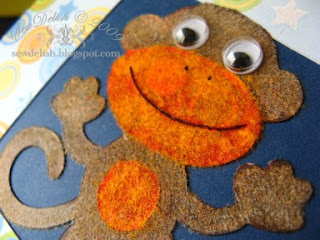
Here is a cute little furry card that I made for my little nephew's 4th birthday. He just loves monkeys so this card from the New Arrival Cricut cartridge was perfect.
When I made the card I had planned to cut the parts of the monkey in separate colours and paper piece them together; but changed my mind when I remembered that I had some gorgeous chocolate brown and orange flocking and googly eyes in my stash.
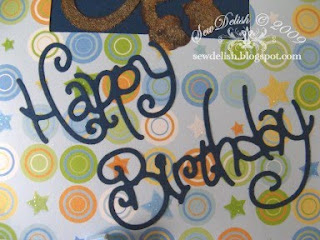
The swirly happy birthday sentiment is the Sizzix Sizzlits Happy Birthday #3 die. I use this one mostly on girly cards, but I thought it looked so much like the monkeys tail that I just had to use it! I cut it using the same card I used behind the monkey.

Monday, 31 August 2009
Typing, Typing, Typing and Nothing to Do with Sewing or Crafts! LOL
I did learn the basics back in high school and that has been enough to get me by most of the time but I tend to lazy type. Usually I type though mostly looking at the keyboard, then the screen and also using the wrong fingers for the keys. Sound familiar?????? The only drawback this way has been that any typing I do seems to take forever.
I started thinking that I would benefit by online so that I can work at it in my own time. I have just started using the free online typing tutor on Typing Web. It has already made a huge difference! I won't tell you how many words I started out typing, but lets say I am now at typing so much faster and with a far better accuracy than what I began with.LOL So if you would like to improve your typing/keyboard skills with different exercises and tests go and have a look. If you register they will store all your results as you learn and practice so you can see how you improve.
Anyway I am off to practice some more typing exercises........I will be back to show you some more of my latest creations soon.
SewDelish

Friday, 28 August 2009
Birthday Card for My 10 Year Old Princess!
The high heel shoes are from a Personal Impressions stamp that was sent to me by the team at Crafts Beautiful. It is actually an iris folding stamp, but I masked out those areas before I stamped it on patterned card. It is heat embossed with black sparkle embossing powder and filled in with holographic silver and turquoise glitter. The shoes are adhered using foam dots.
The ric rac and ribbon on the side I stitched with the sewing machine and sparkle embroidery thread.
The number 10 I cut on my cricut expression cutting machine using the storybook cartridge and then glittered all over. I also cut Birthday Girl for the inside and added some bling! I used a Martha Stewart zig zag border punch on patterned card for the lacy effect down the right side of the card.
I will be looking at fabric and clothing for future ideas for colours and layouts as it was such a big hit! Anyway I would love to hear what you think.

Wednesday, 12 August 2009
Flower Girl Dress with Stitched in Keepsake Pendant
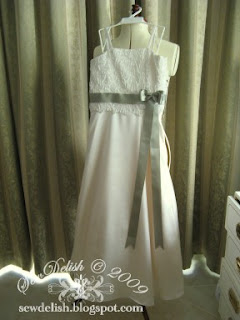
I was asked to make a flower girl dress a while back in ivory and sage green. I was given two weeks to make it, brief instructions as to what it was to look like, as well as a bag of satin and lace. The dress needed to look like a mini version of the bridesmaids dresses, but there wasn't a pattern available for a tween girl that was exactly what they were after so I ended up using the Burda 9697 dress pattern and altering it.

The skirt was cut on the bias and it had to be left for a week to hang and allow the satin fabric to drop. Unfortunately due to the quality of the fabric given to me it ended up dropping 3 times after I had hemmed it! Several times I had to arrange fittings with a very patient young girl and her mother and re-sew where it needed it. Next time I will have to make sure that I get more than two weeks notice so I am not madly running around with scissors and a tape measure. LOL
The lace overlay was hand stitched in place around the waist as was the satin bow. I stitched a pendant on the bow that could be removed when the wedding was over so the young girl could have it as a keepsake after the big day when the dress would no longer fit.

Friday, 7 August 2009
More Fun Making and Creating with Flower Soft
A card using one of the gum leaf toppers I made the other day, a couple of the Flower Soft butterflies and flowers sentiments and a Wedding stamp.

Wednesday, 5 August 2009
Creating with Flower Soft and the New Polar White
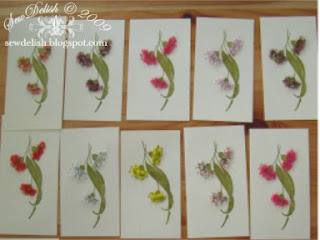
DH took me to a craft fair over the weekend and they had almost every colour of Flower Soft in stock, including the newly released Polar White! I also found the stunning gum tree leaves and flowers stamp. I instantly fell in love with it and just had to have it as well as a few extra jars of Flower Soft. I have since gone mad stamping and adding flower soft in almost every colour. LOL Can you tell?
The Polar White Flowersoft is very different from all the other colours and even has a little sparkle. It has a different texture, is much softer and stays together a little more. It is perfect for snow! I can't wait to try it on my Christmas cards this year!
The cards are for a swap and the others are toppers that I am in the process of making to add to other cards as they are finished. Once the flower soft glue is dry I add Stickles on the gumnut flowers to look like pollen.
I have heard you can use flowersoft on fabric! I will add that to my technique to try list and let you know how I go.
Have you used Flower Soft? What do you think the new Polar White?

Friday, 31 July 2009
Bling Up Your Blogger Blog - Add A Favicon
You will be making changes to the html part of your blog so make sure to create a backup of your blog template before you make any changes. Copy and paste it into a word document then save to your hard drive.
Visit this site to upload a pic and they will make it usable as a favicon. I used a free clip I found on the web and saved to my computer.
Once you have uploaded your image, copy the information where is says host it a iconJ, then you need to expand the widgets on your blog and scroll about a third of the way down. Paste the info to the html part of your blog as below.
]]>< /b: skin >
PASTE LINK INFO HERE

Tuesday, 21 July 2009
Storing and Organising Spools of Thread
More Sewing room storage ideas for you. If you love sewing and are anything like me you have probably accumulated loads of reels of thread. Here is how I keep my stash under control.
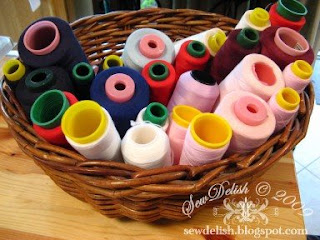
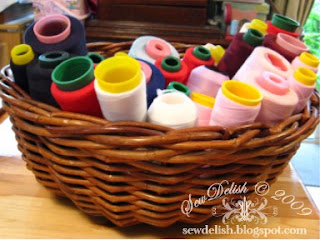
My large overlocking threads I keep in a large basket within easy reach of my machine. Each reel holds about 5000m of thread and I have 4 of each of these in the colours I use the most - White, Cream, Black, Navy, Baby Blue and Pink.
The small reels, with anything up to 1000m of thread, I keep on my thread board. I made this quickly and easily by hammering nails onto a sanded length of wood.

How do you store your sewing threads? If you have a pic somewhere on the web, leave a link in the comments here and I will come and see.

Saturday, 18 July 2009
Making A Chain Maille Bracelet
I have had my eye on this Chain Maille bracelet since the launch of the Make Jewellery magazine online party in April and I have finally finished my version. I have never attempted chain maille jewellery before so I printed out the instructions and they were very easy to follow. If you can open and close jump rings as well as wrap a bead with wire you already have all the skills you need.
I ended up pinning my bracelet to a cushion as I worked so I could see where I was up to as I added the jump rings. I spent 5 minutes here and there until all the rings were joined and then spent a few weeks trying to work out just what beads I wanted on it. LOL One must rush these things after all!
I finally decided on a mixture of glass and shell beads in pink and green pastels. I love how they look with the silver rings. These bracelets would make a beautiful gift and look gorgeous too.

Thursday, 16 July 2009
Printable Lemon Curd Recipe
I made some lemon curd a few weeks ago and thought I had already posted about it, but for some reason the post seems to have disappeared. So now for attempt number 2......
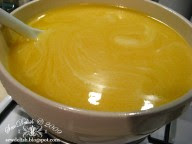
I absolutely love lemon curd or as some call it lemon butter. Either way it tastes divine on a slice or three of freshly home-baked bread. I use a recipe that I have had for years. Unfortunately I can't remember where I found it, I can only think it may have been a CWA Recipe book or Mrs Beeton's Recipe Book. Scroll down for the recipe.
Anyway the reason I love this recipe is that it uses whole eggs rather than just the yolks so you end up with a larger quantity and no wasted egg whites. A jar of lemon curd makes a lovely gift, perfect for hampers or just a small thank you.
I sterilise all my jars and utensils in the dishwasher and then place them in the oven at 100°C to drain and dry.
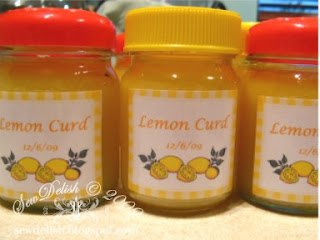
The labels I made using Microsoft publisher on the business card setting. I just placed the text and images where I wanted them and printed them out. I adhered them to the jars using clear packing tape, so it would protect the label from moisture damage (I use an inject printer) and to make them easy to remove once the jars were empty.
And now I guess you are all waiting for the recipe............
Just right click on the image that you prefer below to open in a new tab and then save to your computer or print it out.

Wednesday, 24 June 2009
Card - Hello Cricut and Cuttlebug
This is what I used to make the cards.
- Cuttlebug textile texture embossing folder for the card blank
- Cuttlebug embossing folders - swiss dots and mesh for the flower centres
- Cricut machine
- Walk in My Garden Cartridge for stems
- Tags, Bags, Boxes and More cartridge for blackout feature flowers
- Storybook Cartridge for the Tag
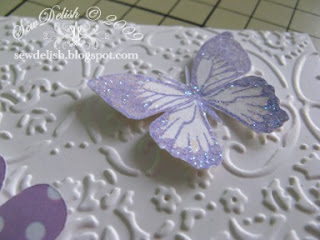
- Hero Arts Butterflies Stamp Set butterfly is hand cut after stamping
- Papercraft Stamps for the Hello stamp
- Polkadot Ribbon
- Versamagic Petunia Ink
- Pearlescent Dimensional Paint for the centre of the 'O' in the Hello sentiment
- Ice Stickles for sparkle on the butterflies
- Mini Foam Dots
I made miniature versions of the flower I used on the front to decorate the inside of the cards too. They add a lovely touch when the card is standing open.
I ended up making a few more of these to keep in my box of cards. I've left the tag blank so I can add a suitable sentiment later on.

Friday, 12 June 2009
Shower Cap Tutorial - Instructions Updated
If you make a showercap using my instructions I would love to see a photo. Just post a link to it in a comment below or on the tutorial post.

Wednesday, 10 June 2009
Cuttlebug Die and Embossing Folders Storage
Now that my buttons seem to be organized and under control I am moving onto sorting and organizing other things. I am more likely to use things that are easily accessible and quick to find and if it looks good, even better!
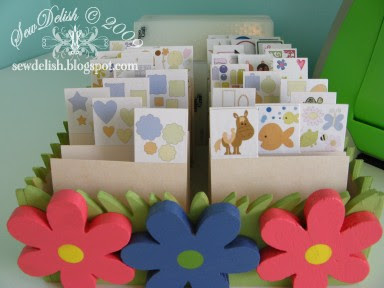
Amongst some old boxes I found this gorgeous green box shaped like blades of grass. I picked it up for free from a store several years ago that was throwing it away. I kept it knowing that someday I would find a use for it. LOL
Look how it matches my cuttlebug perfectly! I glued on some cute wooden flowers and then made some labelled divider tags like the ones found here.
This box stores all of my small 2" and 3" Cuttlebug dies, small embossing folders and Sizzix Sizzlits with my large embossing folders right at the back. Now I just need to find something to match for storing my Cuttlebug alphabet dies and Sizzix Bigz and Originals dies!

Monday, 25 May 2009
Button Crafting - Is it a Necklace, a Belt or a Bracelet?
I started out with the intention of making a button belt and then once it was finished I thought it would make a gorgeous button necklace when combined with a handcrafted pearl necklace.
It also looks funky as wrap around bracelet! It might even make a really interesting headband as well but I think I prefer it as a shabby chic style necklace.
It took me about 2 hours to design and create. All the buttons are threaded onto one really long piece of wire folded in half. No two buttons the same with 61 used in total. It took me ages to go through my buttons to find all the ones in just the right colours with each one being different. I made a loop closure as a feature at one end with pearl beads. I varied how I wired the buttons too. Some I threaded the wire through simply, some twisted, or criss-crossed, some over and under opposite ways and a few have been thread through backwards and the wire twisted into a coil on the top.
I am not generally one for buttons on jewellery but this one I am really happy with. I would love to hear what you think.


