I recently had a go at making a rag quilt and this is the result. A shabby chic look! It took 2 weeks to complete and I love it! You may have noticed that I used it for the backdrop when I took photos of my newly acquired Singer Puzzle Box. These quilts are an ideal project to make on an antique or vintage sewing machine as straight stitch is all you need.
To make a rag quilt, work out the following (just copy and paste text into a word document to print). A word of warning - PRESHRINK all fabric first before cutting. I forgot to preshrink the filling so now I have a rather puckered, puffy looking quilt. It has given it a more homely appeal though, which I like.
The number of squares you would like across (don’t allow for seam allowance at this point)______(I had 10)
The number of squares down_____(I had 15)
Design the pattern you would like your squares to make on the blank template. Mine was diagonal, but you can have random, stripes or even create a picture.
To cut your squares they need to be the finished size plus 3” (2.5cm) to allow for the frayed finish_______(mine were about 5 ½” or 14cm)
Make a note of the number of squares required for each colour.
You need at least 3 layers of fabric for the quilt. Course cotton fabric that frays easily is best. I used approximately 2 1/2m each of the backing and filling and 1m of each for coloured squares on the front.
- A backing
- A flannelette filling (at least 1 layer)
- A top layer (consisting of various colours or just one)
Cut all squares required using a rotary cutter, ruler and a matt.
Assemble piles of fabric in order
- backing face down
- filling
- top layer right side up
Repeat for each square required for your quilt. If you have room lay them out according to the pattern you created earlier.
When sewing the fabric sandwich blocks together treat the backing fabric as if it is the right side. Thus making it easier to remember to sew backing to backing (right sides together). It will all be right in the end you'll see.
Each seam needs to be 1 ½” (3.7cm) and you need to be fairly accurate to help align latter squares. Use a double or triple short straight stitch setting on your sewing machine or sew each seam twice (trust me on this it is necessary to extend the life and wear of the quilt!).
Sew the quilt one row at a time and then sew the completed rows together, aligning all the joins.
For the final sewing part, stitch all the way around outside edges of the quilt.
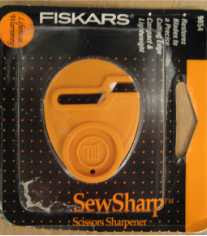
Now for the snipping. You will need a pair of comfortable, good quality scissors (you will be grateful later). I bought a pair of Fiskars spring grip scissors in my local sewing shop and incidentally I found some identical in the hardware shop 1 week later called pruning snips also made by Fiskars!
Snip into each seam almost to the stitching every ¼” (0.5cm). This needs to be done all over. Just be careful not to cut the stitching or you may need to do repairs!!
SNIP, SNIP, SNIP, SNIP, SNIP, SNIP
Once all the snipping is done, including the outsides edges, the quilt can be washed then dried in a dryer.
Washing produces a huge amount of fluff and lint, so part way through the cycle while water is still in the machine use a sieve to scoop it out. It is much easier to remove the lint this way and will save wear and tear on your machine and dryer. The quilt will need to be washed and dried several times to produce a really frayed effect, but it will be well worth the effort.
Iron and then use or display your quilt.


